
| |
Amiga Emulator FAQ |
Updated: 04/08/17
Picasso96 is a Retargetable Graphics driver set for graphics cards for the
Amiga. A popular make of
card were the PicassoII
and PicassoIV
Zorro cards, hence the name.
1. If using UAE or Winuae, you need to configure the Display settings to the
resolution you require
and whether you want full or windowed.
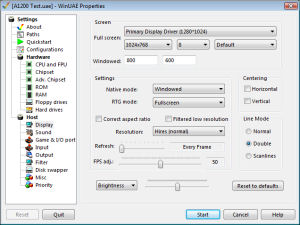
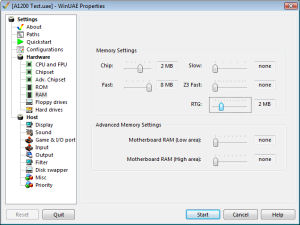
2. Next you need to configure some RTG RAM. 2MB or more will do. Save your
configuration
and then click Start.
3. Download Picasso96
(at least v2) from aminet. Extract the files to the hard disk.
e.g.
lha x picasso96.lha sys:
4. Run the Setup install script.
5. Click Proceed on the Welcome Screen.
6. Select the Installation Method e.g. First Install, Upgrade or Uninstall. Click First Install in this case, then Proceed.
7. Selection Installation Mode: Intermediate or Export. Use the default and click Proceed.
8. For the Installation Options select Install for Real and then click Proceed.
9.Read the message and click Proceed. You may need to click proceed a few times here.
10. Select the graphics card you have installed. Here, uaegfx is ticked for
you .
It may say you have no graphics card installed. Just click Proceed to continue.
11. Select SYS:Libs for the location of the libraries. Click 'Select another location' if you have an alternative location set up.
12. Select SYS:Devs/Monitors for the location of the Monitor drivers.
13. Select SYS:Prefs for the Picasso96 preferences program.
14. Select a location for the support files. e.g. SYS:
15. Select Yes or No to install the application drivers. Click Yes in this case.
16. Select Yes or No to install the Printer Patch. Click Yes in this case.
17. Check the choices made and click Yes to continue, or No to change them again.
18. Click Proceed to begin installation.
19. Click Proceed to create a Drawer for cards and chip files.
20. Click Proceed with Copy to install the library file and all the following files required.
21. Click Proceed when Installation has finished.
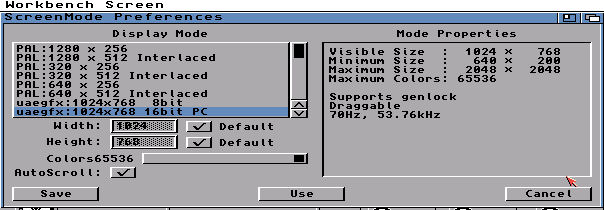
22. Once the Installer has finished load the ScreenMode program from
SYS:Prefs and select a new
Monitor driver with resolution and colour depth. 16 bit is best for modern graphics
cards. Click Use to
test the new mode, when satisfied with the new resolution, reload program and
click Save.
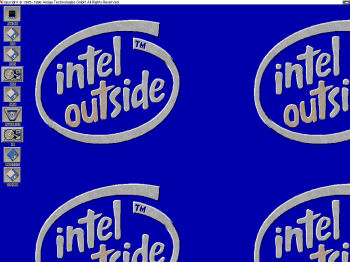
23. If you install some new icon sets such as Magic Workbench or New Icons
you can get something
colourful like this:
![]() Back to UAE FAQ.
Back to UAE FAQ.