 |
Amiga Emulator FAQ |
Updated: 29 July 2020
1. How do I install E-UAE and Hi-Torro on the Macintosh?
Download SDL Library from LibSDL, extract the files and copy the framework.sdl into the \Libraries\Framework folder on the System drive.
Download E-UAE for the Macintosh, double click to extract the files and move the entire folder to a location of your choice. The default location is \Applications\UAE.
Download Hi-Torro extract the files and move them into the the UAE folder.
2. How do I initially setup Hi-Torro to use uae?

First you will need to set up Hi-Torro to locate the uae program to launch the emulator. Click on File, Preferences then set the following settings:
UAE Path: The default is /Applications/uae/uae for the emulator, click on browse to change this to the correct folder select the uae file when you found it.
Default Configuration file: If you want a specific configuration file
loaded such as your Workbench or a favourite game, then select it here. By default
it
will use default.uae
UAE Output Redirect file: Select the default file used for all output from uae. If you do not want this un-tick the Enabled button.
3. How do I configure the emulator using Preferences windows?
There are 11 tabbed windows to configure uae for a specific Amiga model or configuration for specific games.
ROM - This is important configuration, you will need to specify the Kickstart ROM to use. Kickstarts can be dumped from a real amiga using the transrom utility provided or one supplied with the AmigaForever CDROM or download (Plus or Premium editions). Versions comes from v1.0 to v3.1.
Key: Specify a rom.key file here if using roms from the AmigaForever package otherwise leave blank.
RAM: You can specify how much ram and of what type. You will need between 512K and 2MB Chip ram for most games. For extra speed you can also specify Fast RAM or Z3 (Zorro3) RAM for more memory hungry applications in Workbench. Use 512M for A500, 1MB for A600 and 2MB for A1200 for Chip RAM.
Chipset: There were three chipsets: OCS (Original Chipset) which appeared on the A500/A2000/A1000, the ECS (Enhanced Chipset) for the A500+/A600/A3000 which has higher graphic resolutions and finally AGA (Advanced Graphics Architechture) on the A1200/A4000 which included 256 colours.
CPU: You can specify the model of the Motorola 680x0 CPU here. Early Amigas mainly used the 68000, while the 68020 to 68060 appeared on later Amigas such as the A1200 and A4000. For games use either the 68000 or 68020 CPUs.
Floppies: Here you can select your floppy disk images (ADF, ADZ, DMS etc) to load games into the emulator.
4. What are the Keyboard shortcuts?
Here are a list of useful keyboard shortcuts (they are displayed when Hi-Torro is first loaded or press Cmd + E):
F11 + Q = Quit
F11 + R =Warm Reset
F11 + LShift + R = Cold Reset
F11 + D = Debugger
F11 + S = Toggle Window/Full screen mode
F11 + G = Toggle Mouse Grab mode
F11 + M = Toggle Mouse mode
F11 + I = Toggle Display inhibit
F11 + A = Cycle audio interpolation modes
F11 + Numpad + = Increase frameskip rate
F11 + Numpad - = Decrease frameskip rate
F11 + F1 = Open dialog for image for floppy drive 0
F11 + F2 = Open dialog for image for floppy drive 1
F11 + F3 = Open dialog for image for floppy drive 2
F11 + F4 = Open dialog for image for floppy drive 3
F11 + LShift + F1 = Eject disk in floppy drive 0
F11 + LShift + F2 = Eject disk in floppy drive 1
F11 + LShift + F3 = Eject disk in floppy drive 2
F11 + LShift + F4 = Eject disk in floppy drive 3
F11 + F = Action Replay Freeze button
5. How do I boot from a floppy disk image (ADF) to play a game or boot up into Workbench?
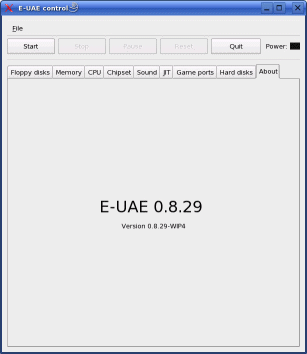
In E-UAE, click on Floppies tab, select DF0 and click on Insert, then select the ADF file from your hard disk. Click OK. Click on Start to launch the emulator and run the game or Workbench.
6. How do I create a hard disk to install Workbench on it?
First create a folder on your Hard disk to store your Amiga files which is used to emulate an Amiga hard disk. For example, \Users\accountname\Documents\ AmigaHD.
In E-UAE, click on Hard Disks tab. Click on Add, click on Select and browse to the folder you created for the 'hard disk' directory. Now enter the following details to create a hard disk:
a) Path: \Users\Document
b) Device Name: DH0
c) Volume name: System
Click OK when done. To install Workbench insert a Workbench or Install disk in DF0 under Floppies and click Start. See instructions here for installing Workbench.
7. Is there a newer version of E-UAE?
No, it is has been superceded by FS-UAE and/or Winuae on Wine.
![]() Back to UAE FAQ.
Back to UAE FAQ.