
| |
Amiga Emulator FAQ |
1. Assuming you have attached your new Hard disk to your Amiga, insert the Install 3.1 disk and boot up.
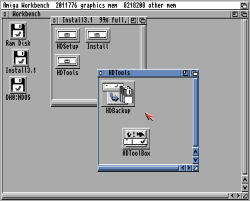
2. Open Install3.1 and then HDTools folder. You should find HDToolbox. By default, HDToolbox will use the scsi.device which can handle internal scsi or ide hard disks, but if your hard disk controller is different then you need to change the device. Select the HDToolbox icon, goto Icon menu and select Information.
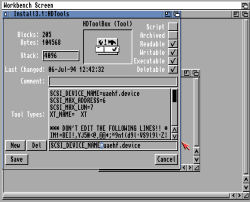
Here, the SCSI_DEVICE_NAME=scsi.device has been changed to SCSI_DEVICE_NAME=uaehf.device. Click Save to make the change.
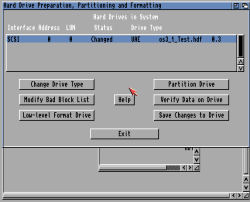
3. Now run HDToolbox, and it should detect and display your hard disk as 'Unknown' on SCSI Interface, Address 0, LUN 0.
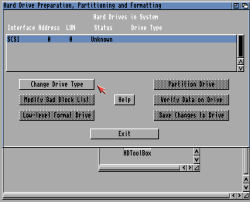
4. You will need to read the correct drive geometry by selecting 'Change Drive Type'.
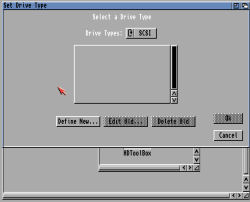
5. Click on 'Define New ..' to define your new drive type. Then press the 'Read
Configuration' button to read the drive information off the disk (if using
Winuae, make sure 'Enable RDB' is selected for HDF type disks).
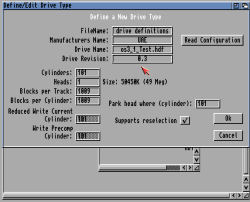
Hopefully it would have picked up the correct manufacturer and drive model
and more importantly the size. In this case a 50,540K drive.
Click OK to use this configuration.
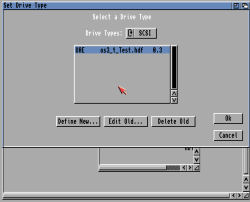
6. The new drive type will be displayed, click OK to accept the new configuration.
7. Now you are ready to partition your new hard disk. Click on Partition Drive.
8. By default, it will set up two new partitions for you. One for Workbench and Programs and one for Data. You can change this by resizing existing partitions, delete partitions and create new partitions if you wish. You can also use other FileSystems such as SFS which is faster and supports larger drives than the default FFS system.
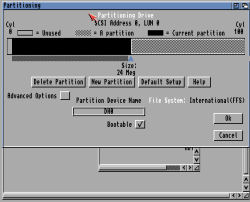
The Partition Device name can be anything you want, as long as each partition has a unique name, usually the standard is DH0, DH1, DH2 etc. Click OK when done.
9. You disk is now configured, click on 'Save Changes to disk'.
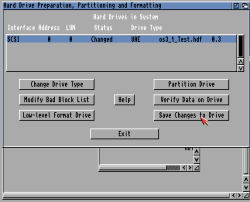
10. Click Exit to finish configurating the hard disk. Reboot the Amiga, so that Kickstart can read the setup hard disk and display the partitions in Workbench.
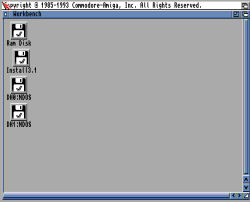
Notice that the names are shown as DH0:NDOS and DH1:NDOS, which means they are unformatted.
11. Select DH0:NDOS volume and then goto Icon, Format.
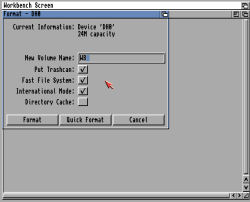
Change the Volume name from 'Empty' to more useful, such as 'WB' in this case. Then click Format and confirm the dialog boxes.
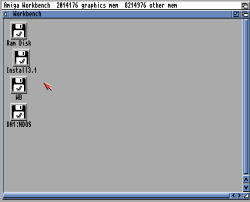
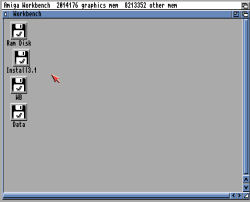
12. You should now have a volume called WB on the desktop.
13. Select the DH1:NDOS volume and then goto Icon, Format.

Change the volume name from 'Empty' to a more useful name, such as 'Data' in this case. Click Format to begin formatting
14. You should now have a new Volume called Data on the desktop.
Your hard disk is now ready to install Workbench, programs and data on it!
![]() Back to UAE FAQ.
Back to UAE FAQ.